Juniper
Introduction#
Multi-Factor Authentication (MFA) is an extra layer of security used when logging into websites or apps. Individuals are authenticated through more than one required security and validation procedure that only they know or have access to.
RADIUS is a protocol commonly used to authenticate, authorize, and account for user access and actions. Acceptto offers a simple solution for adding MFA to Juniper VPN via its Radius solution. This step-by-step integration guide illustrates how to configure Juniper VPN and Acceptto RADIUS MFA authentication solution.
Pre-Requisites#
- An Acceptto RADIUS Agent that is configured and connected to your user directory (for example Microsoft™ ‘Active Directory™’) (See this page for the instructions).
- A user with administrative privileges for the vSRX device.
Configure the Acceptto™ RADIUS Agent#
To integrate Acceptto with your Juniper Firewall, you will need to install an Acceptto RADIUS Agent on a machine within your network. This server will receive RADIUS requests from your Juniper Firewall, check with LDAP server to perform primary authentication, and then contact Acceptto cloud service for secondary authentication.
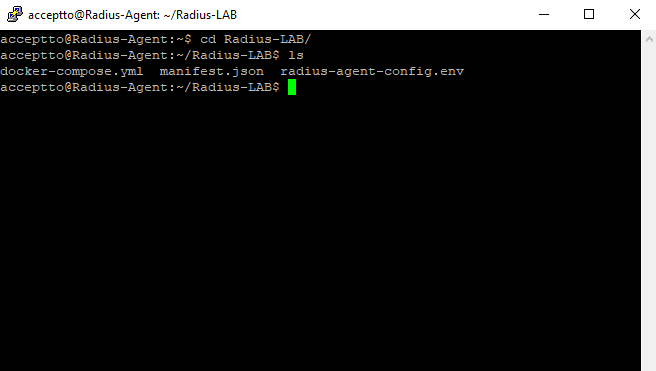
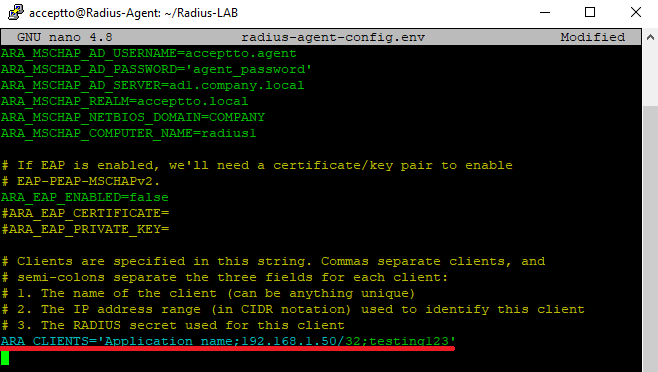
Login to the Acceptto RADIUS Agent with an administrative user and open the radius-agent-config.env file with an editor. It is located in the installed directory of RADIUS Agent. RADIUS clients are configured in this setting.
Go to the bottom of radius-agent-config.env file and change the ARA_CLIENTS attribute as follows. The values should be separated by semicolons (;).
ARA_CLIENTS = An optional name for your Okta;IP address of your Okta agent; a shared secret
An example configuration might look like this:
ARA_CLIENTS = Okta;192.168.10.10/32;testing12345
Save file and run the following command for set changes:
docker-compose down && docker-compose up -d
Configure the Juniper vSRX device#
Log into Juniper device with an administrative user and change to the configuration mode. All of the subsequent steps in this guide assume that you will remain in configuration mode.
Create an IP address pool for your VPN clients:
set access address-assignment pool vpn-pool family inet network <addresses for your VPN clients> xauth-attributes primary-dns <the IP address of the DNS server>Create an access profile for the RADIUS Agent by typing the following commands.
set access profile acceptto-radius authentication-order radiusset access profile acceptto-radius address-assignment pool vpn-poolset access profile acceptto-radius radius-server <the RADIUS Agent IP address> timeout 120 retries 2 secret <the shared secret configured in the Acceptto RADIUS Agent>CommitNote that the timeout is extended to give users enough time to authenticate the push notification. You can reduce this timeout based on user feedback. The number of retries by default is 2, but you can remove it if you do not wish to give the user multiple authentication attempts.
Create an IKE proposal configuration by typing the following commands. You may need to customize this configuration depending on your security policy; this example is just the basic setup.
set security ike proposal ike-proposal1 authentication pre-shared-keysset security ike proposal ike-proposal1 dh-group group20set security ike proposal ike-proposal1 authentication-algorithm sha-384set security ike proposal ike-proposal1 encryption-algorithm aes-256-cbcset security ike proposal ike-proposal1 lifetime-seconds 86400CommitCreate a policy that uses the proposal above and authenticates the client using a pre-shared key:
set security ike policy ike-policy1 mode aggressiveset security ike policy ike-policy1 proposals ike-proposal1set security ike policy ike-policy1 pre-shared-key ascii-text <the preshared key for your clients>CommitCreate a gateway to terminate the VPN connections. Note that the user-at-hostname and connections-limit are dependent on your environment and your Juniper license, respectively.
set security ike gateway gateway1 ike-policy ike-policy1set security ike gateway gateway1 dynamic user-at-hostname <user@junipervpn.example.com>set security ike gateway gateway1 dynamic connections-limit <X>set security ike gateway gateway1 external-interface <interfaceX>set security ike gateway gateway1 version v1-onlyCommitCreate a tunnel interface that is going to handle the traffic between the external and internal zones.
set interfaces st0 unit 0 family inetCommitCreate an IPSEC proposal for VPN clients.
set security ipsec proposal ipsec-proposal1 protocol espset security ipsec proposal ipsec-proposal1 authentication-algorithm hmac-sha-256-128set security ipsec proposal ipsec-proposal1 encryption-algorithm aes-256-cbcset security ipsec proposal ipsec-proposal1 lifetime-seconds 32400CommitCreate an IPSEC policy for the VPN clients.
set security ipsec policy ipsec-policy perfect-forward-secrecy keys group20set security ipsec policy ipsec-policy proposals ipsec-proposal1commitCreate the VPN. Bind the interfaces and policy, and associated traffic selectors.
set security ipsec vpn remote-vpn1 bind-interface st0.0set security ipsec vpn remote-vpn1 ike gateway gateway1set security ipsec vpn remote-vpn1 ipsec-policy ipsec-policyset security ipsec vpn remote-vpn1 traffic-selector ts1 local-ip 10.0.0.0/24set security ipsec vpn remote-vpn1 traffic-selector ts1 remote-ip 0.0.0.0/0
Configure the NCP VPN client#
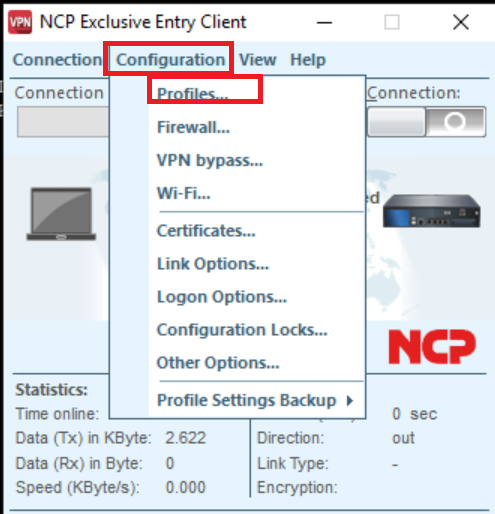
- Open the NCP user interface and select the Configuration tab. Select Profiles from the dropdown.
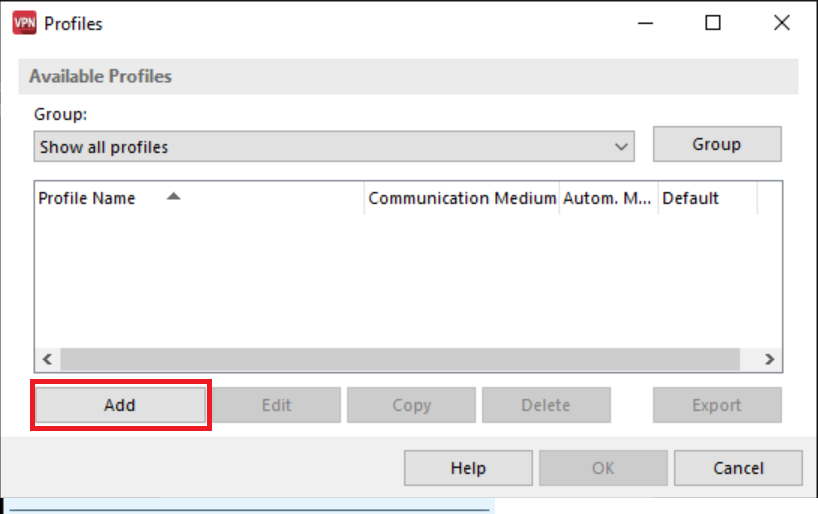
- The profile configuration menu is presented, select Add:
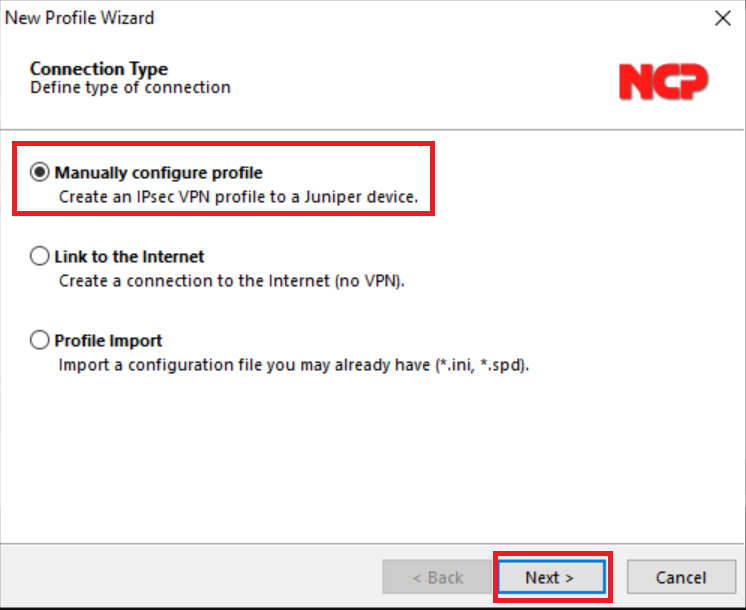
- In the new profile wizard window, select Manually configure profile and click Next.
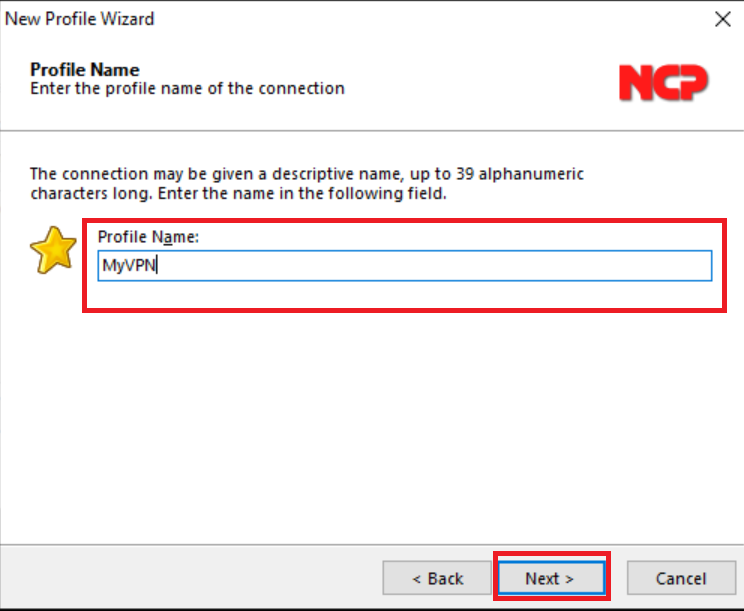
- Enter a friendly name for the new VPN client configuration in the Profile Name field and select Next.
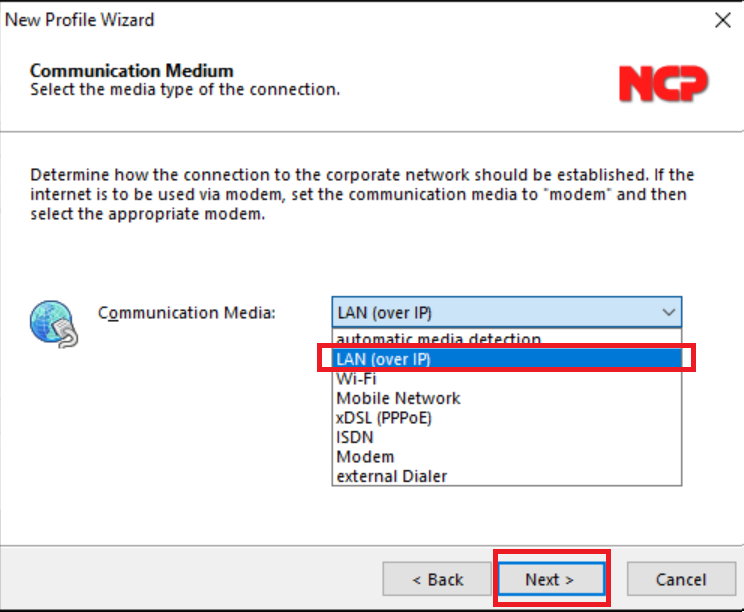
- Select the media over which the VPN is going to be connected. In this example, we are using LAN. Then, select Next.
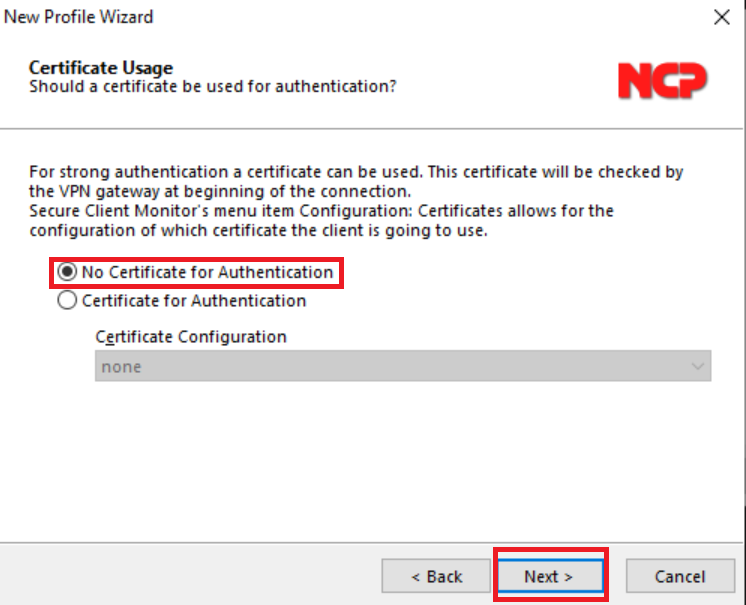
- Select the usage of certificates to authenticate the client. Certificates are recommended. Select Next.
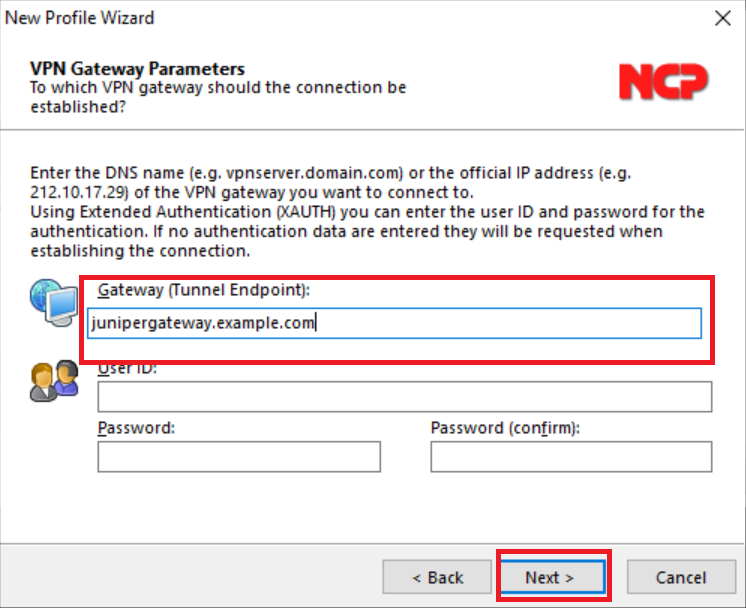
- Configure the VPN gateway and then select Next.
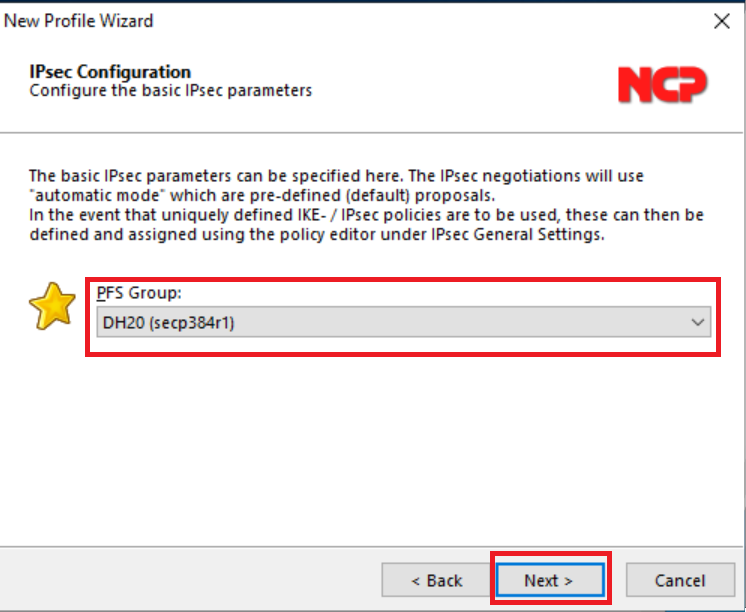
- Select the Diffie-Hellman (DH) group to use. This group must match the DH group configured in the vSRX device. Select Next.
- Select the user identity that identifies the tunnel to the device. In this example, we are using user@domain. It must match the configuration from step 8 of “Configure the Juniper vSRX device.” Click Finish.

- When the profile configuration menu appears, select Edit > IPSEC General Settings. Review the settings and ensure they exactly match the configuration on the vSRX device.
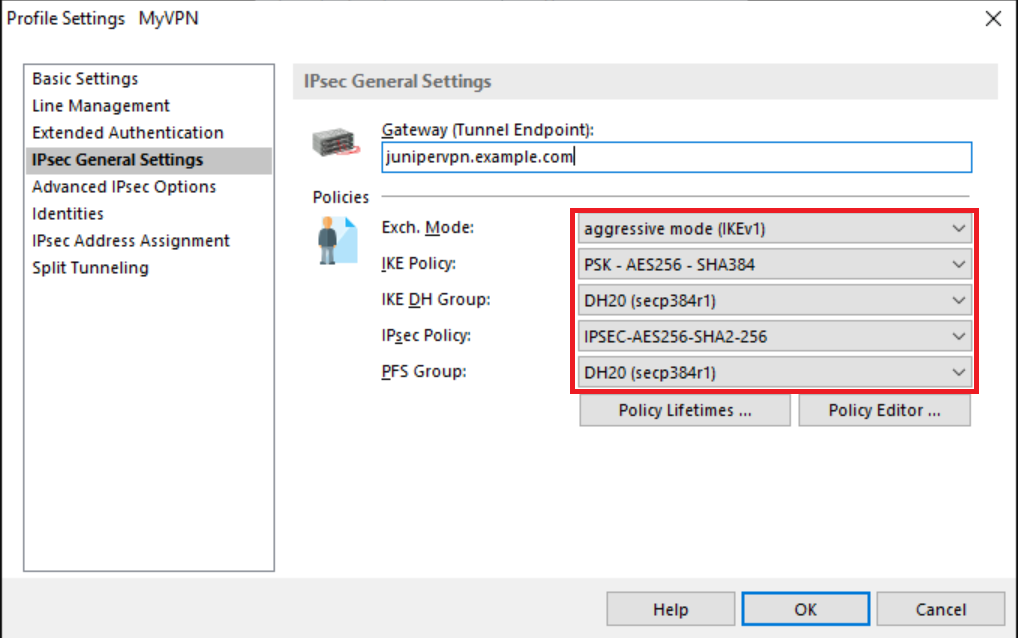
- Optionally, you may select Policy Editor and create IKE and IPSEC policies that match the configuration in the vSRX device.

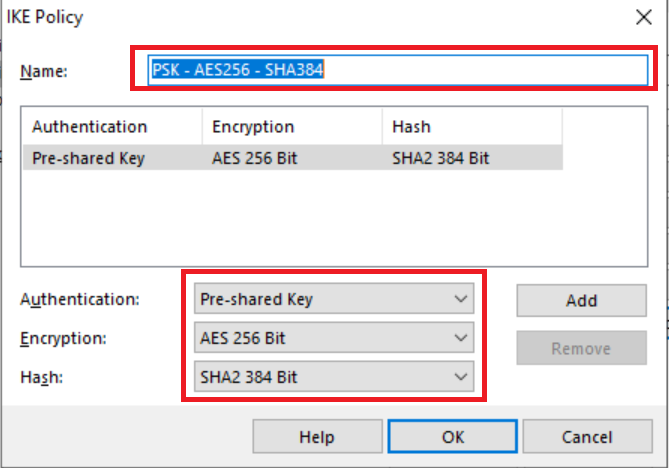
- Edit the IKE policy by providing a valid name and setting the authentication method for the tunnel, encryption, and hashing algorithms to match the tunnel IKE configuration. Then select OK.
- Edit the IPSEC policy. Provide a friendly name and select the Protocol, Encryption, and Authentication algorithms that match the tunnel IPSEC configuration. Then select OK.

Test Your Setup#
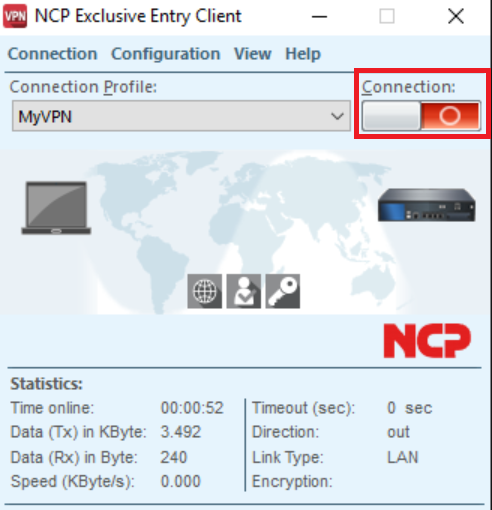
- Open the newly configured NCP VPN client and select the sliding control to connect to the Internet.
- The VPN client prompts the user for authentication. The user must input a valid Active Directory username and password.
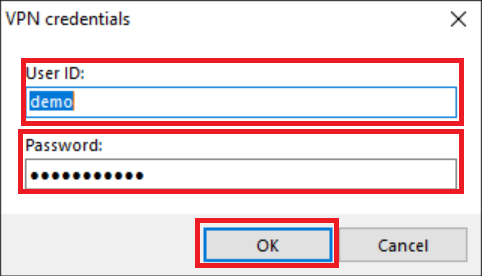
The VPN client sends the credentials to the vSRX device, and the vSRX authenticates the user to RADIUS. If the user’s credentials are correct, the user is prompted to approve the authentication by the It’sMe mobile application, and is then logged in.
What to look for if the connection is unsuccessful:
a. If login fails, displaying the message “PAP/CHAP error Wrong User ID or password (VPN)”: The user has most likely mistyped their password or has not acknowledged the push notification from the It’sMe application.
b. If the message “VPN error RECV-MSG2-AGGR-PSK -> invalid preshared key,” is displayed: Go to Configuration, select Profiles, edit the profile in use, select Identities and check the pre-shared configuration by re-typing the pre-shared key.
c. If the message “VPN error Could not resolve VPN gateway name (DNS),” is displayed: Ensure that your DNS server can resolve the host you are trying to contact. For example, use the ping command.
d. If the message “VPN error Connection to VPN gateway failed. Please check your internet connection,” is displayed: Verify if the security zone or any in-between firewall is blocking IPSEC connections.
Support#
If you require assistance, please email us at support@acceptto.com
Sales#
Want to learn more about our MFA solutions? Contact our Professional Services for a Demo today.
Disclaimer#
All product names, trademarks, and registered trademarks are the property of their respective owners.
All company, product, and service names used in this document are for identification purposes only. The use of these names, trademarks, and brands do not constitute an endorsement by the Acceptto Corporation.