Leostream
Introduction#
Multi-factor authentication (MFA) is an extra layer of security used when logging into websites or apps to authenticate users through more than one required security and validation procedure. Security Assertion Markup Language (SAML) is a protocol for authenticating to web applications. SAML allows federated apps and organizations to communicate and trust one another’s users.
Leostream develops a vendor-neutral connection broker, which is software that maps end users to computing resources, such as desktops, that are hosted in a data center. A connection broker integrates end-user access points, including thin clients, laptops and Web browsers, with back-end systems hosting desktops and applications. It also integrates all other data center systems required for a virtual desktop infrastructure, including security, authentication, and load balancing systems.
Acceptto, as a SAML provider, improves the user login experience for Leostream users with convenient MFA. This manual illustrates how to configure Leostream with Acceptto’s single sign-on (SSO) solution.
Pre-Requisites#
- An Acceptto account with a configured Identity Provider and LDAP Agent (see this page for instructions).
- A user with administrative privileges for the Acceptto service.
- An organization identifier provided by Acceptto (organization slug).
- Leostream 9 or higher. SAML logins are currently supported only for user’s logging in using the Leostream Web client. Leostream Connect, thin client, and zero client logins do not support SAML-based authentication.
- A user with administrative privileges for Leostream.
Acceptto SAML Configuration as Identity Provider (IdP)#
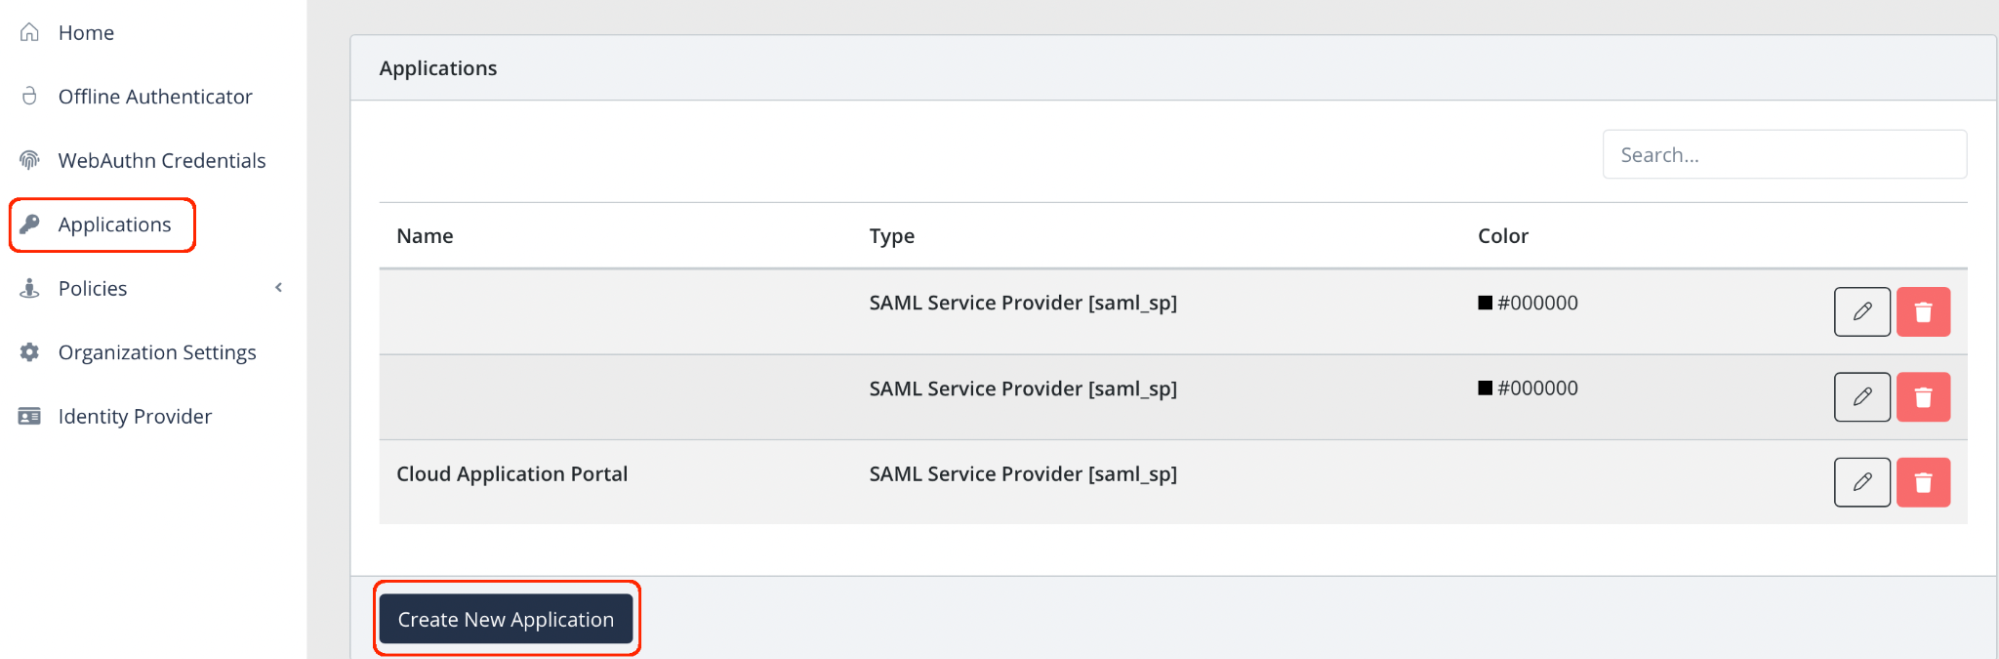
Log into the Acceptto Dashboard with an administrative account and go to Applications.
Create a new application by selecting the Create New Application.
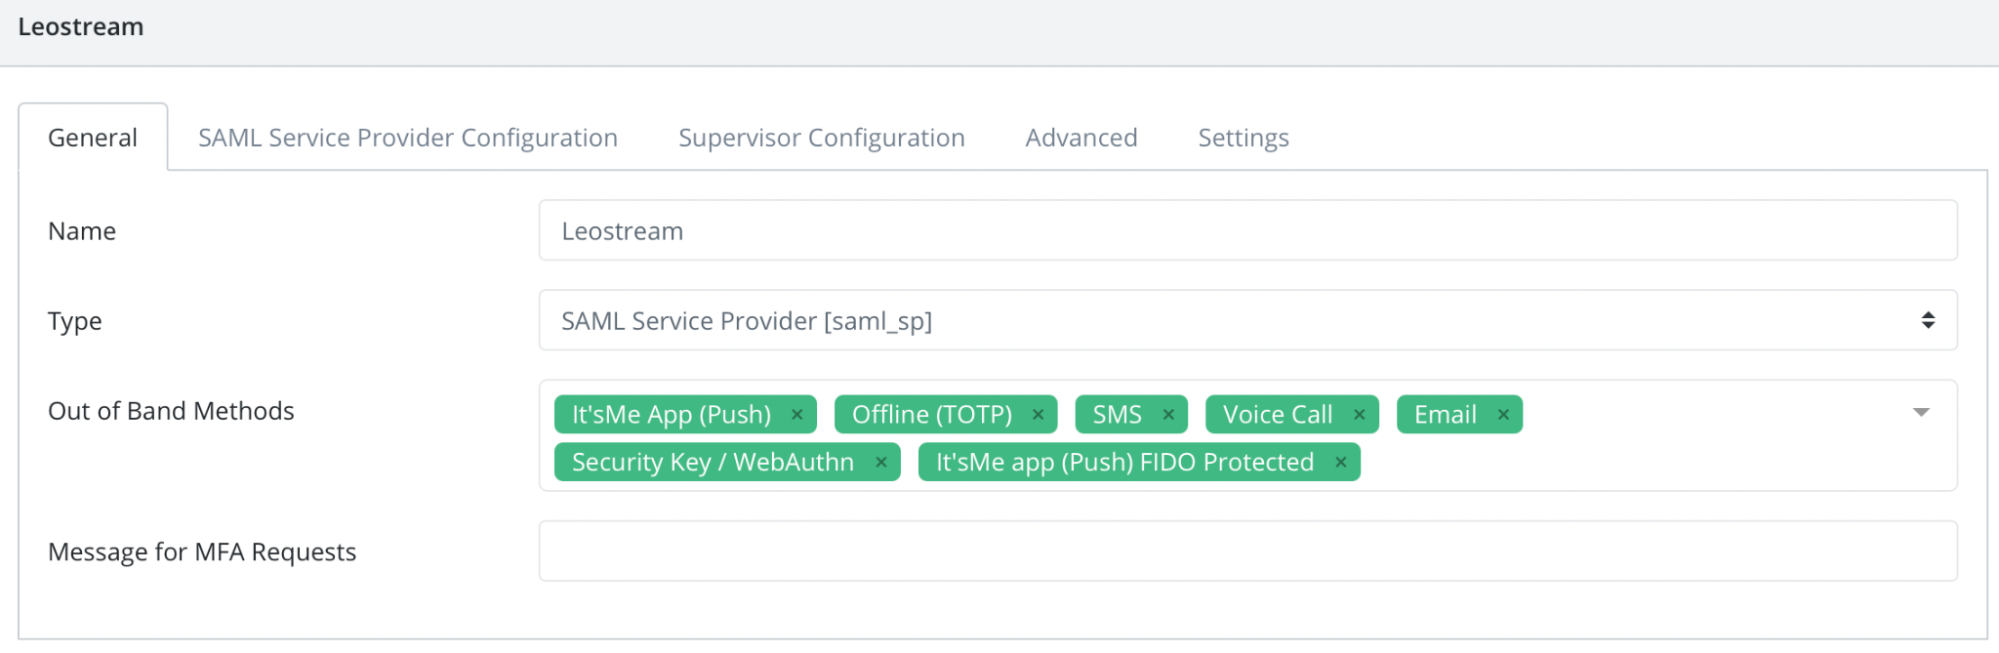
In the New Application form, enter the following values under the General tab.
- Name - The application name displayed in the admin panel and application portal and used for push notifications and audit logs. (e.g. Leostream)
- Type - Select "SAML Service Provider" from the options
- Out of Band Methods - Select the allowed methods for approving MFA requests
- Message for MFA Requests - Enter the user-facing message for Push, SMS, and e-mail MFA requests (optional)
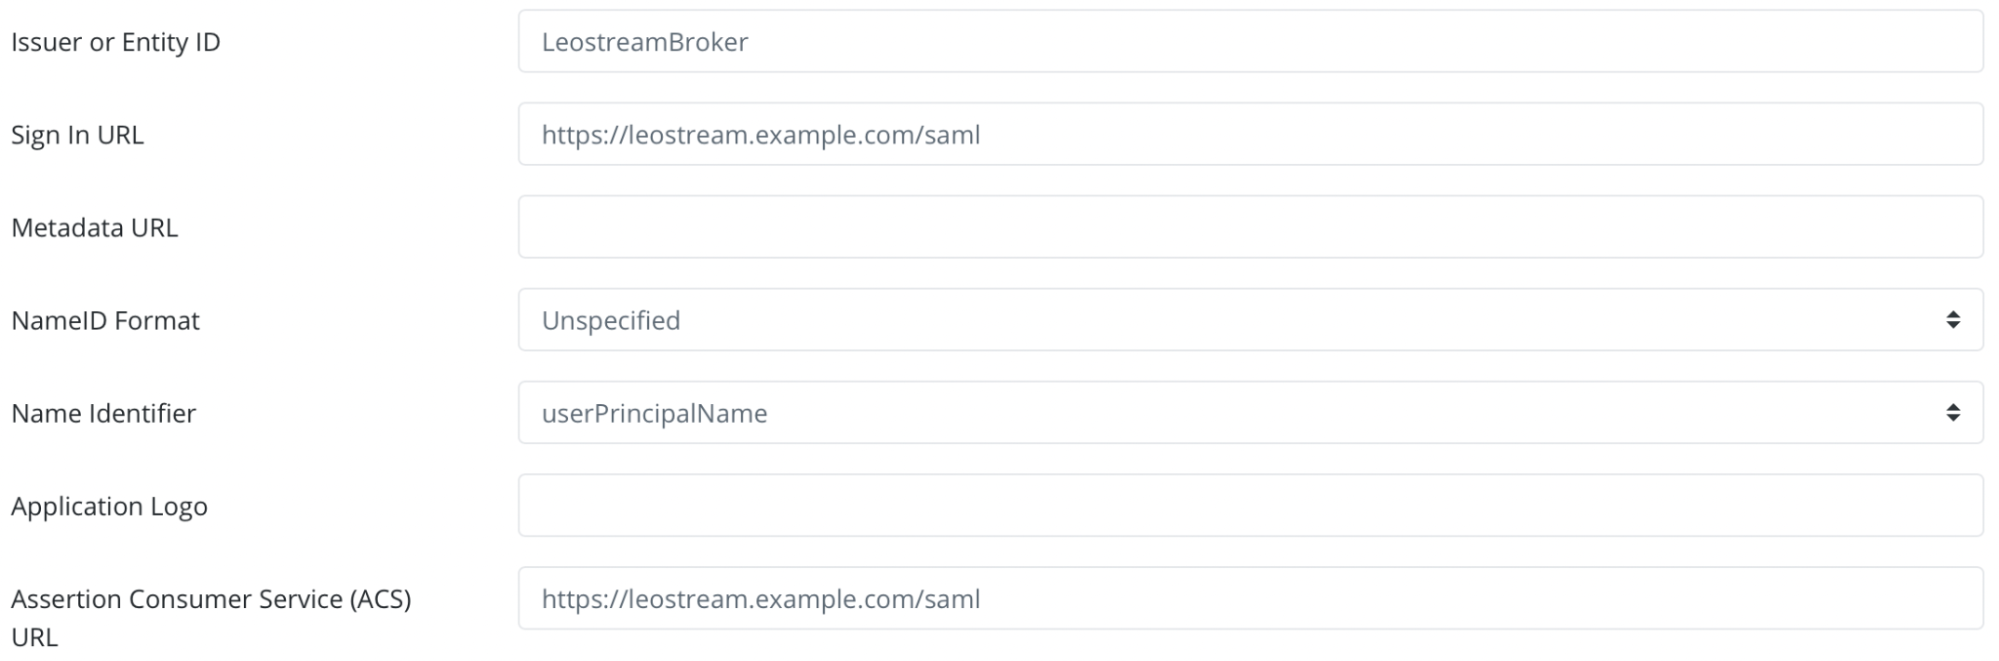
Under the SAML Service Provider Configuration tab, enter the following values:
- Issuer or Entity ID– Enter the Issuer/EntityID of your Leostream instance (e.g. LeostreamBroker).
Sign in URL - The URL used to login to your Leostream (e.g.
https://Leostream_FQDN /saml). - NameID Format - Select "Unspecified" from the dropdown menu.
- Name Identifier - Select "userPrincipleName" from the dropdown menu.
- Assertion Consumer Service (ACS) URL - Enter the URL on the service provider where the identity provider will redirect to with its authentication response (e.g.
https://Leostream_FQDN /saml).
- Click "Add New Attribute Assertion" button and create attributes like the below image:
Friendly Name Name Value Name Format Email email userPrincipalName urn:oasis:names:tc:SAML:2.0:attrname-format:unspecified Login login sAMAccountName urn:oasis:names:tc:SAML:2.0:attrname-format:unspecified memberOf memberOf memberOf urn:oasis:names:tc:SAML:2.0:attrname-format:unspecified Last Name lastname sn urn:oasis:names:tc:SAML:2.0:attrname-format:unspecified First Name firstname cn urn:oasis:names:tc:SAML:2.0:attrname-format:unspecified 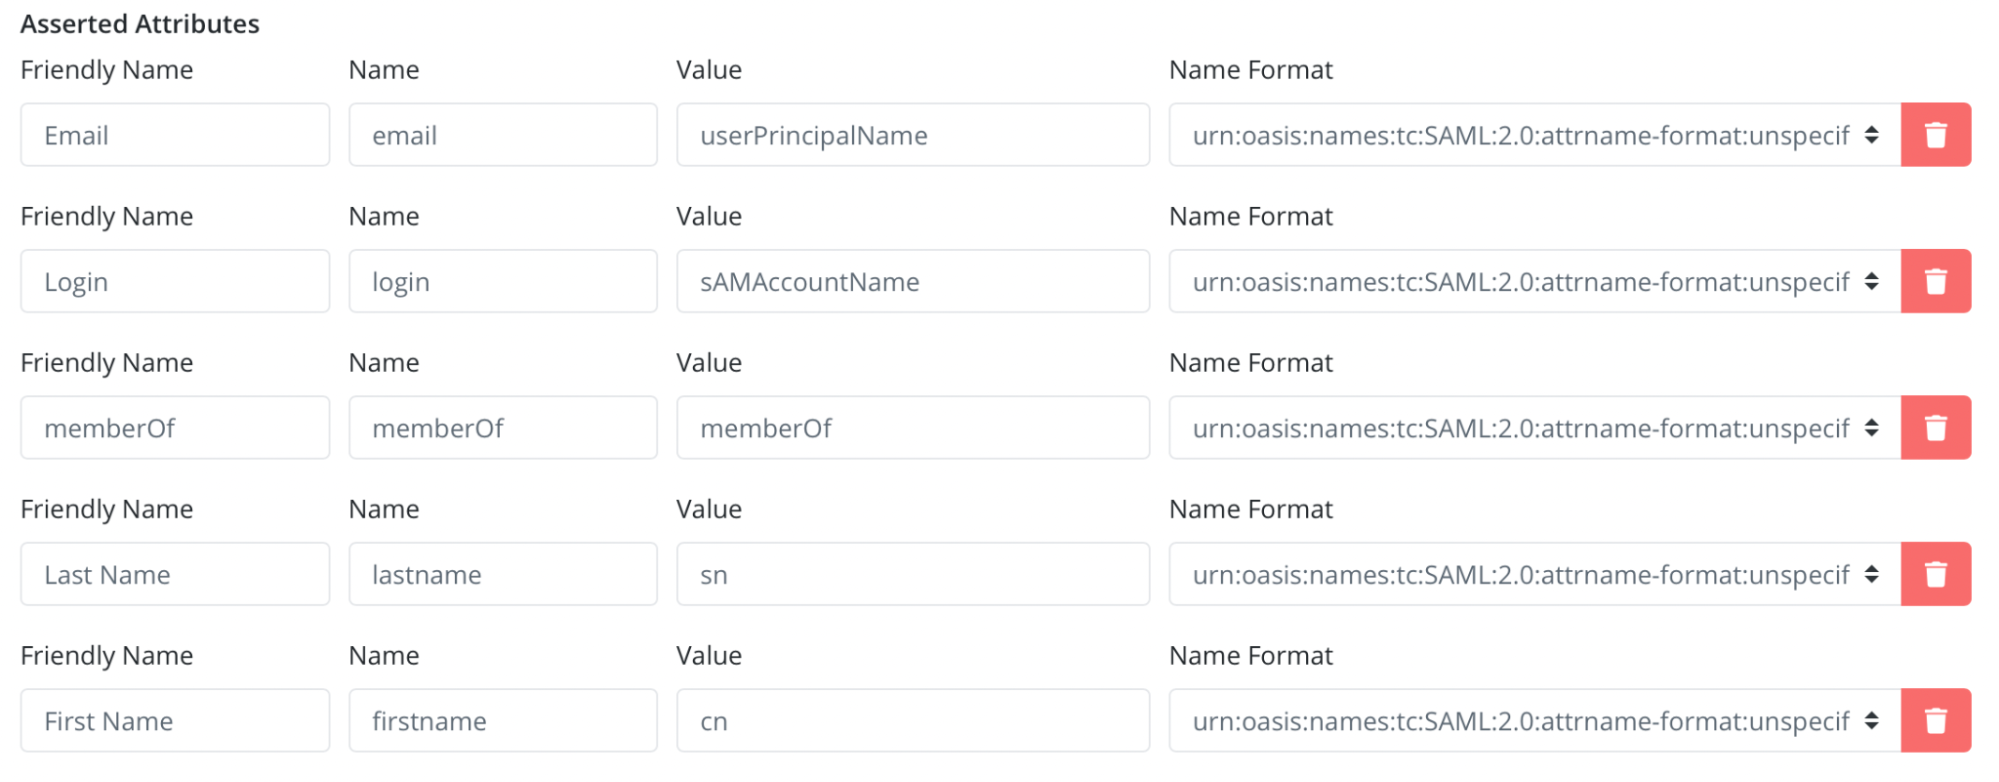
- Issuer or Entity ID– Enter the Issuer/EntityID of your Leostream instance (e.g. LeostreamBroker).
Sign in URL - The URL used to login to your Leostream (e.g.
Click Save to create the Application.
Download your SAML IdP X509 certificate. Go to
https://sso.acceptto.com/[organization identifier]/saml/download/certto download the cert.pem file containing your certificate.Download your SAML metadata file. Go to
https://sso.acceptto.com/[organization identifier]/saml/download/metadatato download your metadata file.
Configure Leostream as a SAML Service Provider#
After creating your Application in Acceptto, register it with Leostream by creating a SAML authentication server in your Connection Broker, as follows.
Go to the Setup > Authentication Servers page.
Click the Add Authentication Server link.
Select SAML from the Type drop-down menu. You can add a single SAML IdP to your Connection Broker. Therefore, you will not see the SAML option in the Type drop-down menu if you already defined a SAML IdP. If you do not see the SAML option in the Type drop-down menu and your Authentication Servers page does not already list a SAML IdP, contact sales@leostream.com to enable SAML IdP integration in your Leostream environment.
Enter a descriptive name in the Authentication Server Name field.
In the SAML EntityID edit field, enter the unique Entity ID you specified when creating the Application in Acceptto.
Under the Connection Settings section, enter the following values:
- Identity Provider login URL - Enter the SingleSignOnService URL you obtain from the Metadata XML file you downloaded earlier from Acceptto.
- Identity Provider XML Metadata - Enter the content of the Metadata XML file you downloaded earlier from Acceptto.
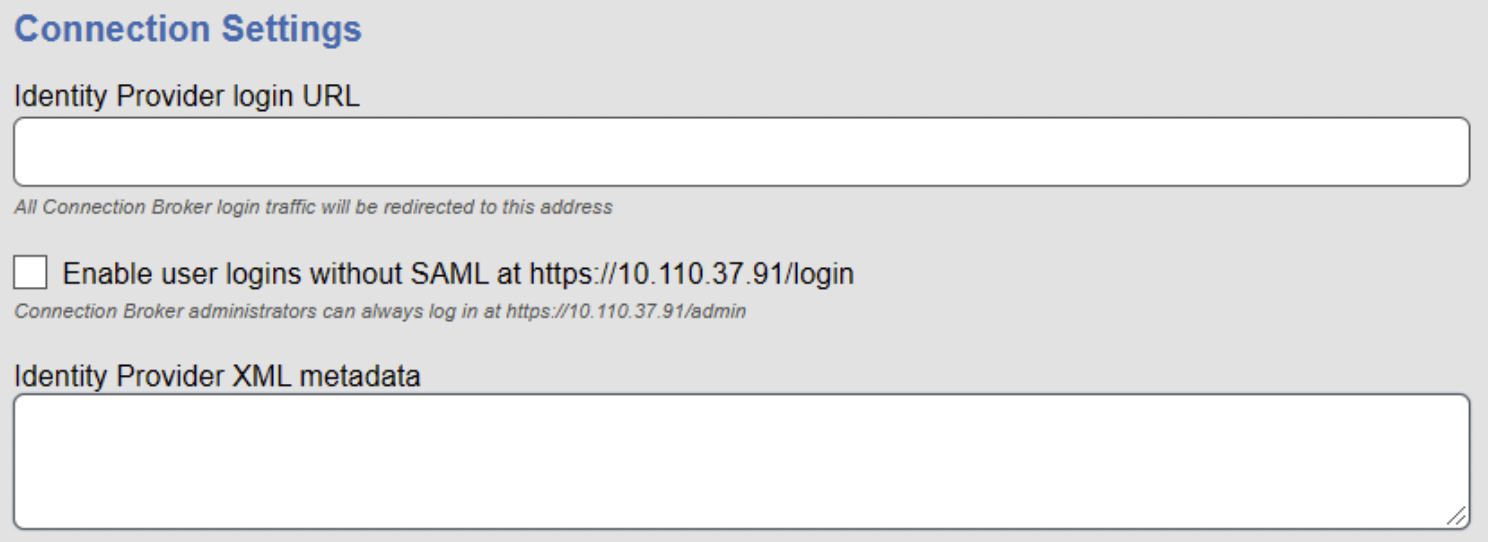
By default, after you created a SAML-based authentication server, the Connection Broker redirects all users to the Acceptto login URL when the user visits the Connection Broker login page. To allow users to bypass the SAML-based authentication server, select the Enable user logins without SAML check box.
Click Save.
Go to the Configuration > Assignments. Click Edit on your Acceptto Authentication Server. Enter memberOf in the Attribute field and select Contains in the Conditional box.

Add groups based on the Group name, which is case sensitive.
Add the application pools and assign groups to them.
Test Your Setup#
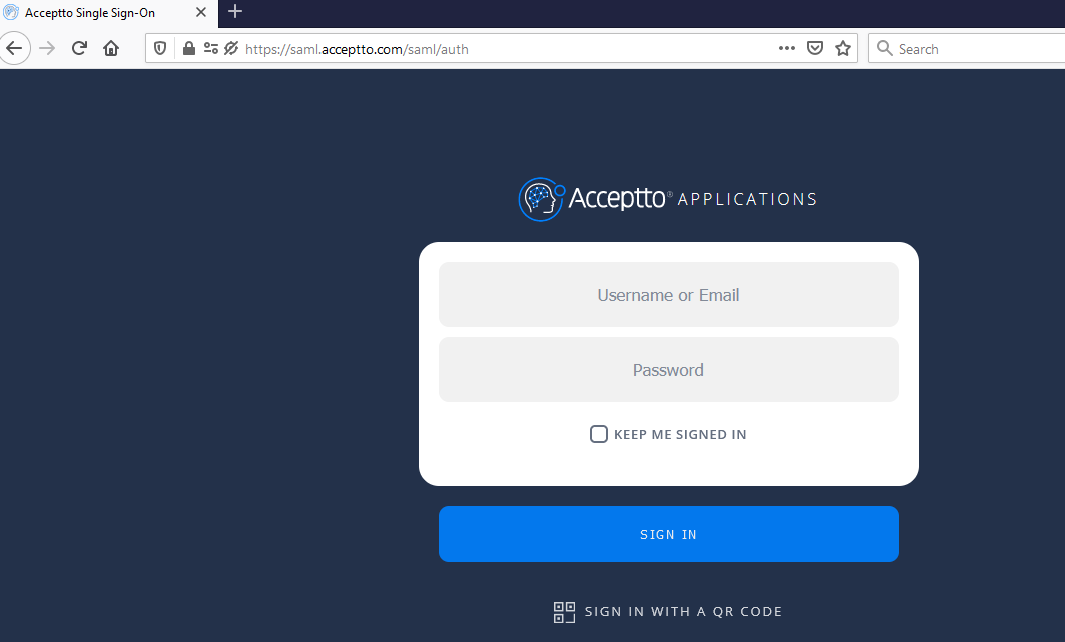
Go to your Leostream URL through a browser.
You will be redirected to the Acceptto SSO page.
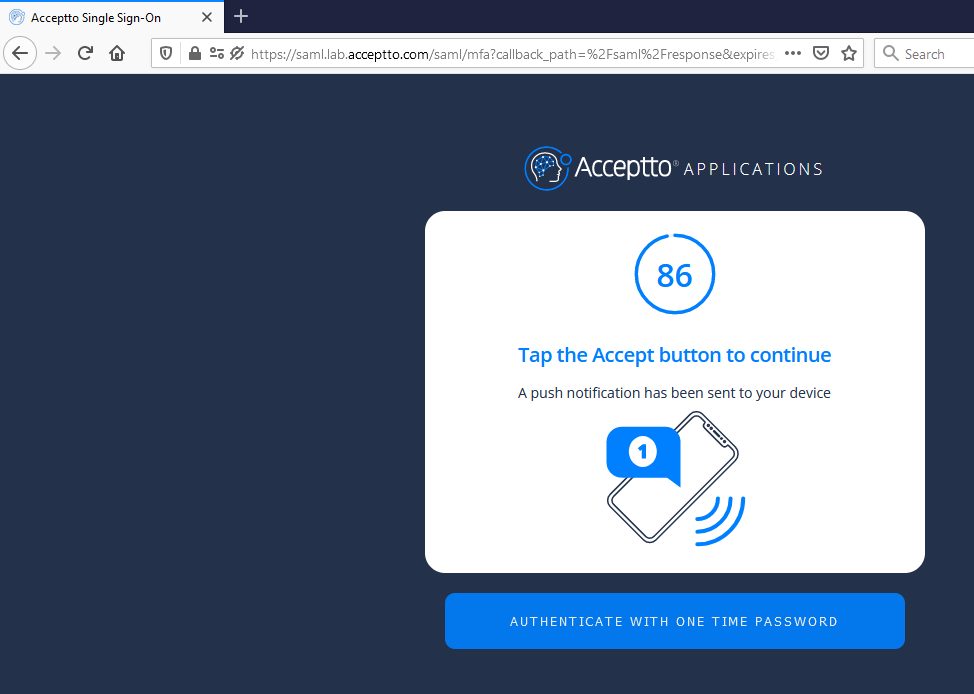
After successful authentication, you’ll see the Acceptto MFA options. Select your desired method. Next, approve the authentication request on your It'sMe mobile app.
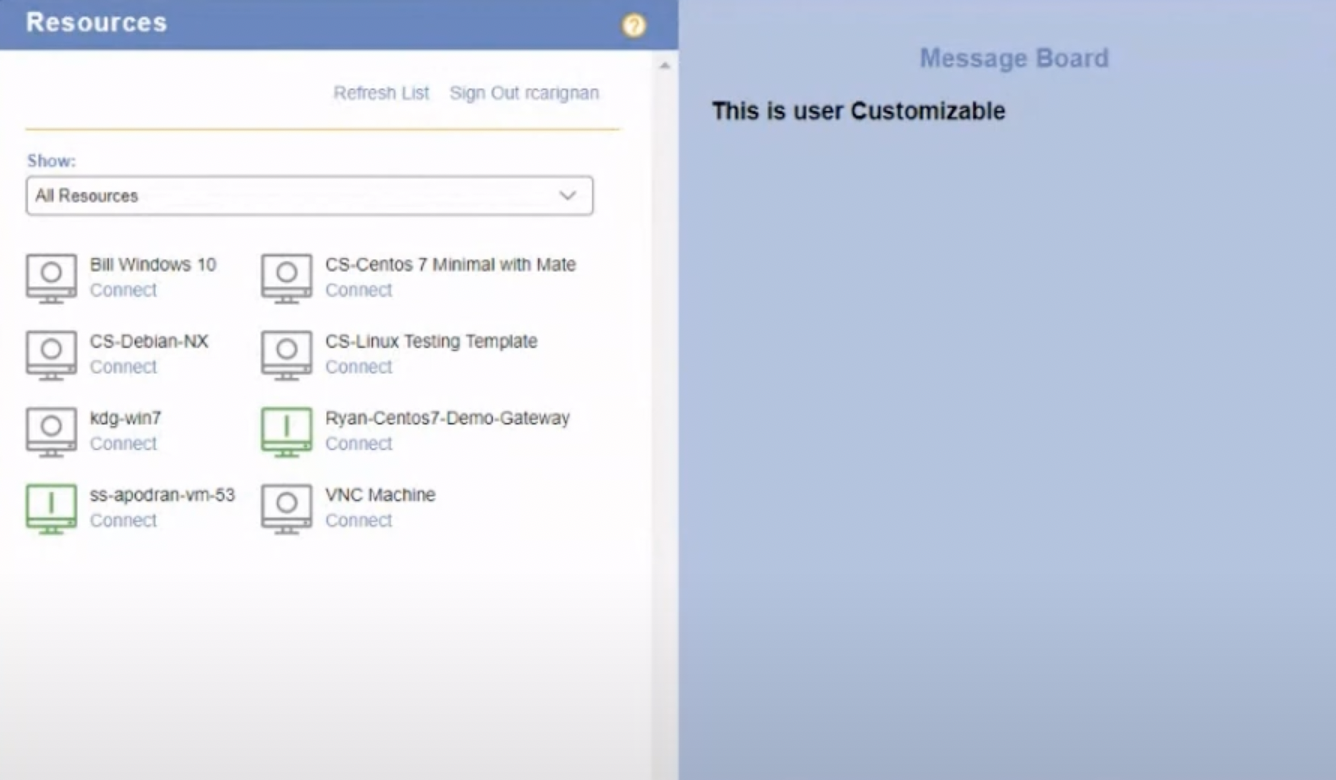
Finally, you will be redirected to your resource page.
Support#
If you require assistance, please email us at support@acceptto.com
Sales#
Want to learn more about our MFA solutions? Contact our Professional Services for a Demo today.
Disclaimer#
All company, product and service names used in this document are for identification purposes only. Use of these names, trademarks, and brands does not constitute an endorsement by the Acceptto Corporation.